Using em and rem Relative Units in Web Design

Typography plays a vital role in web design, shaping the visual appeal and readability of content. As websites continue to evolve and adapt to various devices and screen sizes, the need for flexible and scalable typography becomes increasingly crucial. This is where em and rem relative units come into play.

Em and rem units are relative units of measurement that offer a powerful way to size elements, margins, and typography in a flexible and scalable manner. While both units have their unique characteristics, they share a common goal: to provide a more adaptable and user-friendly experience across different devices.

What Are em and rem Units?

Typography and layout elements on a webpage often require flexible sizing to adapt to different screen sizes and user preferences. Em and rem units offer a dynamic approach to achieve this flexibility, allowing designers to create responsive and accessible designs.

Defining em and rem Units

Em and rem units are relative units of measurement in CSS that enable designers to specify sizes and dimensions relative to other elements. While they share similarities, they have distinct characteristics.

Em units (short for “emphatic”) are relative to their parent element. When you assign a font size or any other property using em units, the value is calculated based on the font size of the element’s parent. For example, if an element has a font size of 1em and its parent has a font size of 16 pixels, the element’s font size will be 16 pixels.

Rem units (short for “root emphatic”) differ from em units in that they are relative to the root element of the HTML document, typically the <html> tag. This means that when you assign a font size or any other property using rem units, the value is calculated based on the root element’s font size. This allows for more consistent sizing across the entire document, regardless of nesting levels.

What’s the Difference Between em and rem?

The key distinction between em and rem units lies in their relative reference points. Em units are influenced by the font size of the parent element, which can lead to compounding effects when nesting elements with different font sizes. On the other hand, rem units provide a more straightforward and predictable approach as they are based on the root element’s font size.

Advantages of Using em and rem Units

  • Scalability: Em and rem units excel in creating scalable designs. Defining sizes in relation to parent or root elements allows you to easily adjust the size of entire sections or even the entire website by modifying a single value. This scalability is particularly valuable for responsive designs that need to adapt across various devices and screen sizes.
  • Accessibility: Em and rem units contribute to improved accessibility by allowing users to adjust font sizes according to their preferences. Users with visual impairments or those who prefer larger or smaller text sizes can rely on browser settings or custom stylesheets to scale the content appropriately.
  • Consistency: Rem units, in particular, promote consistency throughout a website. Since they are based on the root element’s font size, changes to the root font size will uniformly affect all elements that use rem units, ensuring a harmonious typographic hierarchy.

Practical Applications of em and rem Units

Responsive Typography
  • Flexible Typography with em Units
    Em units shine when it comes to creating flexible and adaptable typography. Setting font sizes using em units establishes a typography system that scales seamlessly with its parent element. This enables text to adjust proportionally across different screen sizes, making it more readable and user-friendly. Whether it’s the body text, headings, or any other text elements, utilizing em units allows for more fluid and responsive typography.
  • Consistent Spacing with rem Units
    Rem units offer a straightforward and consistent approach to managing spacing within a design system. By setting margins, padding, and other spacing-related properties using rem units, you can establish a consistent rhythm and spacing hierarchy throughout your website. Changes made to the root font size will cascade down and proportionally adjust all rem-based measurements. This ensures a cohesive and harmonious visual experience, irrespective of the device or screen size.
  • Sizing Elements, Margins, and Padding
    Em and rem units can be applied to various aspects of web design, such as sizing elements, defining margins, and setting padding. When it comes to sizing elements, using em units allows for relative sizing based on the parent element, making it easier to create responsive and scalable designs. Similarly, applying em or rem units to margins and padding ensures consistent spacing around elements, even as the layout adjusts to different viewport sizes.

Best Practices for Using em and rem Units

To make the most of em and rem units in your web design projects, it’s essential to follow some best practices. These guidelines will help you leverage the power of these relative units effectively and ensure a consistent and accessible user experience across different devices and browsers.

Establishing a Baseline Font Size and Using Units Appropriately

Before diving into using em and rem units, it’s crucial to establish a baseline font size for your design. This baseline font size serves as a reference point for all other font sizes defined using em and rem units. Setting the baseline font size using an absolute unit like pixels (px) or points (pt) provides a fallback option and maintains control over the overall visual hierarchy of your design. From there, you can use em and rem units to scale the typography and other elements proportionally.

Handling Nested Elements and Compounding Effects

Nested elements pose a challenge when using em units. To prevent compounding effects and maintain a predictable sizing behavior, it’s recommended to establish a clear structure and limit the use of em units within nested elements. Instead, consider using rem units within nested components to maintain a consistent size relative to the root element.

For example, suppose you have a card component with nested elements like headings and paragraphs. To avoid unintended resizing, set the font sizes of the nested elements using rem units based on the root font size. This ensures that the text within the card maintains a consistent size, regardless of its nesting level.

Considerations for Accessibility and User Experience

When using em and rem units in web design, it’s crucial to consider accessibility and prioritize the user experience. Let’s explore some key considerations to ensure that your designs are accessible and provide an optimal experience for all users:

Impact on Readability and Accessibility

One of the advantages of using em and rem units is their ability to create flexible and scalable designs. However, it’s important to strike a balance between flexibility and readability. Font sizes that are too small or too large can negatively impact the readability of your content, especially for users with visual impairments or those viewing your website on small screens.

Ensure that the font sizes defined using em and rem units are accessible and meet the WCAG (Web Content Accessibility Guidelines) requirements for contrast and legibility. Aim for a minimum font size that allows users to comfortably read the text without straining their eyes. Conduct user testing and gather feedback to validate the readability of your designs across different devices and user scenarios.

Relationship with Responsive Design

Em and rem units play a significant role in creating responsive designs that adapt seamlessly to different devices and screen sizes. By using these relative units, your design elements can scale proportionally, providing a consistent user experience across various devices, from mobile phones to large desktop screens.

When implementing responsive design with em and rem units, consider the breakpoints and media queries that define the layout changes at different screen sizes. Ensure that the font sizes and other elements adapt appropriately to maintain readability and usability on all devices. Testing your designs on various devices and screen sizes can identify any issues and make necessary adjustments to optimize the user experience.

Using em and rem units in web design offers numerous benefits, including flexibility, scalability, and improved user experience. By understanding the differences between em and rem units and applying best practices, you can create designs that adapt seamlessly to different devices and screen sizes while maintaining readability and accessibility. Remember to prioritize the needs of all users, test your designs for keyboard accessibility, and follow established guidelines to ensure an inclusive and engaging experience. Embrace the power of relative units to create visually appealing and responsive designs that captivate and cater to your audience.

Responsive Typography: Creating Stunning Designs for Every Screen

Today with websites being accessed on a plethora of devices with varying screen sizes, the need for responsive web design has never been more crucial. One vital aspect of responsive design is responsive typography, which plays a pivotal role in delivering an optimal user experience across different devices. It ensures that text remains legible, visually appealing, and accessible, regardless of the screen size or orientation.

Responsive typography goes beyond simply adjusting font sizes. It involves understanding the principles of typography and implementing techniques that allow text to adapt and flow seamlessly within different layouts. With responsive typography, web designers can create websites that not only look stunning but also provide an exceptional reading experience for users on smartphones, tablets, laptops, and desktops.

Follow as we unravel the principles and best practices that empower designers to craft flexible and visually appealing typographic systems. We will explore the challenges and benefits of responsive typography, delve into the techniques for implementing it effectively, and discuss the accessibility considerations that should underpin every typographic decision. Whether you’re a seasoned designer or new to the field, this article will equip you with the knowledge and tools to optimize your typography for responsiveness and create remarkable user experiences.

What is Responsive Typography?

Responsive typography is the art and science of creating typography systems that seamlessly adapt to different devices and screen sizes. It involves implementing design principles and techniques that allow text to adjust dynamically, ensuring optimal legibility, readability, and aesthetics across various viewing contexts.

In a responsive environment, typography faces unique challenges. Traditional approaches to typography may not suffice when text needs to accommodate different screen resolutions, orientations, and viewing distances. Maintaining legibility and readability becomes crucial, as text must remain clear and easy to consume on devices ranging from small smartphones to large desktop monitors.

Legibility, readability, and aesthetics are key considerations when dealing with typography in a responsive design. Legibility refers to the ease with which individual characters can be distinguished, while readability focuses on the overall comprehension of written content. Achieving these factors across devices requires careful attention to font selection, size, spacing, line length, and contrast.

Additionally, responsive typography must consider the aesthetic aspect, ensuring that the visual harmony of the design is preserved at various screen sizes. Typography plays a significant role in establishing the tone and personality of a website, and it should maintain its visual appeal while adapting to different contexts.

From a design perspective, responsive typography allows for greater flexibility and creativity. It enables designers to experiment with font sizes, line spacing, and typography styles to achieve the desired impact on different screen sizes. Furthermore, responsive typography contributes to the accessibility of a website, ensuring that individuals with varying abilities can access and engage with the content.

Principles of Responsive Typography

Fluid typography is a fundamental principle of responsive design that ensures text scales proportionally with the viewport size. It allows typography to adapt seamlessly to different devices and screen sizes, maintaining optimal legibility and readability. With percentage-based font sizing and viewport-relative units, such as viewport width (vw) or viewport height (vh), typography can dynamically resize based on the available space, creating a harmonious and flexible reading experience.

The concept of a modular scale is key to establishing a consistent typographic hierarchy across various breakpoints. A modular scale is a sequence of harmonious font sizes based on a defined ratio, such as the golden ratio or the Fibonacci sequence. By following a modular scale, designers can create a set of type sizes that maintain visual harmony and hierarchy, regardless of the screen size. This approach ensures a cohesive and balanced typographic system throughout the responsive design.

Breakpoints and media queries play a vital role in responsive typography by enabling different typographic styles to be applied at specific screen sizes. Defining breakpoints in the CSS code enables designers to target different screen widths and adjust typography accordingly. This allows for tailored typography styles, such as font sizes, line heights, and even font choices, to be optimized for specific breakpoints, enhancing legibility and visual impact.

Relative units, such as em (relative to the font size of the parent element) and rem (relative to the font size of the root element), offer advantages in creating scalable and responsive typography. Using relative units can ensure that typography adapts proportionally to changes in the parent or root font size. This allows for more consistent and flexible typography across different elements and breakpoints, as the relative units adjust based on the font size context.

As technology continues to advance, new trends and advancements in responsive typography are shaping the future of web design. One notable development is the emergence of variable fonts. Unlike traditional fonts that offer a fixed set of styles, variable fonts provide a range of adjustable attributes, such as weight, width, and slant, all within a single file. This flexibility allows designers to create dynamic typographic systems that adapt seamlessly to different screen sizes and user preferences. Variable fonts offer the potential for greater efficiency in delivering typographic variety and optimizing performance, ultimately enhancing the responsive nature of typography.

Put Your Type to Work

Responsive typography plays a vital role in creating engaging and accessible web experiences across various devices and screen sizes. By understanding the principles and best practices of responsive typography, designers can ensure their content remains legible, aesthetically pleasing, and adaptable. Remember to consider accessibility guidelines, such as providing sufficient contrast and using appropriate font sizes, to ensure inclusivity for all users.

Testing is also crucial in the implementation of responsive typography. Be sure to examine your typography across different devices, browsers, and screen resolutions to ensure consistent readability and optimal user experience. Conduct user testing and gather feedback to fine-tune your typographic choices and make necessary adjustments.

As web design continues to evolve, staying up to date with emerging trends and advancements in responsive typography will be essential. Embrace new technologies, explore dynamic typographic systems, and continually seek innovative ways to enhance your typographic designs.

Consider prioritizing responsive typography and incorporating it into your web design workflow to create visually stunning and user-friendly experiences that captivate and engage your audience across all devices.

6 Tips for Visually Appealing Web Design

Picture a website that instantly grabs your attention with its stunning visuals, seamlessly blending colors, typography, and imagery to create an immersive experience. In web design, aesthetics hold immense power. They can captivate users, communicate brand identity, and leave a lasting impression. It’s no wonder that designing a visually appealing website is a top priority for every web designer.

Here we will explore some of the top tips and best practices that will empower you to craft designs that not only look stunning but also enhance user engagement and create a memorable digital presence. With the perfect blend of aesthetics, functionality, and user experience, your website can leave visitors awestruck and craving for more.

Use a Consistent and Cohesive Color Scheme

When it comes to creating a visually appealing website, color is a powerful tool that can evoke emotions, convey meaning, and establish a strong brand identity. Choosing a consistent and cohesive color scheme is essential for creating a harmonious visual experience.

Start by understanding your brand’s personality and the emotions you want to evoke in your audience. Are you aiming for a bold and energetic vibe, or perhaps a calm and serene atmosphere? Once you have clarity on your brand’s essence, carefully select a color palette that reflects these qualities.

Consider using colors that complement each other and create a sense of visual harmony. A good rule of thumb is to choose a primary color as the foundation and then select a few complementary or analogous colors to accompany it. Remember to strike a balance between using bold, attention-grabbing colors and more subtle shades that provide balance and contrast.

Use colors strategically to guide users’ attention and create visual hierarchy. For instance, make important elements, such as call-to-action buttons or key headings, stand out by using a contrasting color that draws the eye. Use more subdued colors for secondary elements to ensure they don’t compete for attention.

With a consistent and cohesive color scheme, you not only create an aesthetically pleasing website but also establish a strong brand presence that resonates with your audience. Let your colors speak for your brand and create an immersive visual experience that leaves a lasting impression.

Choose Complementary Fonts

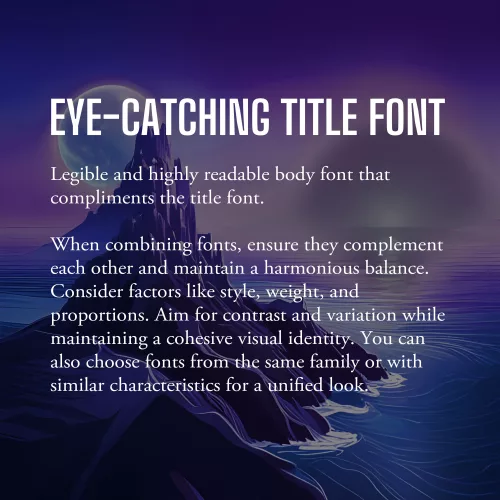
Example font pairing

Fonts play a significant role in web design, as they contribute to the overall look and feel of your website. When selecting fonts, it’s essential to choose ones that are not only legible but also visually appealing and complementary to your design aesthetic.

The first consideration when choosing fonts is legibility. Ensure that the fonts you select are easy to read, even at smaller sizes or on different devices. Legible fonts have clear and distinct letterforms, appropriate spacing between characters, and consistent stroke widths. Test the fonts across various screen sizes and devices to ensure they maintain their readability.

Once you have identified legible fonts, it’s time to think about the visual appeal and creating a harmonious typography scheme. Consider using a combination of fonts to add visual interest and establish a clear hierarchy within your design. One popular approach is to pair a sans-serif font with a serif font.

Sans-serif fonts, with their clean and modern appearance, are often used for headings and titles. They provide a contemporary and straightforward look that grabs attention and makes a bold statement. Serif fonts, on the other hand, have decorative strokes at the ends of characters, giving them a more traditional and elegant feel. They are commonly used for body text as they enhance readability and create a sense of familiarity.

When combining fonts, ensure that they complement each other and create a harmonious balance. Consider their overall style, weight, and proportions. Aim for contrast and variation between the fonts while maintaining a cohesive visual identity. Pairing fonts from the same font family or fonts that share similar characteristics can also create a cohesive and unified look.

Additionally, be mindful of the number of fonts you use on your website. Using too many fonts can lead to visual clutter and confusion. Stick to a limited number of fonts (typically two or three) to maintain consistency and a polished appearance throughout your website.

As with all design choices, it’s crucial to consider your target audience and the message you want to convey. Fonts can evoke different emotions and associations, so choose fonts that align with your brand personality and the overall tone of your website.

Incorporate Whitespace

Whitespace, or negative space, is a powerful yet often underutilized element. It refers to the empty space between elements on a webpage, and it plays a crucial role in creating a visually appealing and user-friendly design.

Whitespace is not just empty space; it is a deliberate design choice that brings balance, clarity, and elegance to your website. Incorporate ample white space to give your content room to breathe, allowing it to stand out and capture the user’s attention. This clean and uncluttered layout creates a sense of organization and makes it easier for visitors to navigate and digest your content.

One of the key benefits of whitespace is enhanced readability. The absence of visual clutter allows users to focus on the important elements and absorb information more easily. Whitespace also helps guide the user’s eye and establish a clear visual hierarchy, making it easier to prioritize content and highlight key messages.

Aesthetically, whitespace creates a sense of elegance and sophistication in your design. It gives your website a modern and spacious feel, conveying a sense of professionalism and attention to detail. When used strategically, whitespace can evoke a sense of luxury, simplicity, and elegance that resonates with your audience.

When incorporating whitespace, consider the overall layout and spacing between elements. Give generous margins around text blocks, images, and buttons. Be mindful of the spacing between different sections and elements on the page. Experiment with different layouts and proportions to find the right balance that suits your content and design aesthetic.

Use High-quality and Relevant Images

Incorporating visually appealing images is a powerful way to enhance the overall aesthetic of your website and captivate your audience. Well-chosen and carefully curated images can communicate your brand message, evoke emotions, and provide valuable context to your content.

First and foremost, prioritize high-quality images. Blurry or pixelated images can significantly impact the visual appeal of your website and create an unprofessional impression. Invest in high-resolution images that are crisp, clear, and vibrant. If you’re using photographs, ensure they are well-lit and properly composed.

Relevance is another crucial aspect to consider when choosing images. Select visuals that are closely aligned with your brand identity, content, and target audience. The images you choose should enhance the message you’re trying to convey and resonate with your visitors. For example, if you’re designing a website for a travel agency, incorporating captivating images of beautiful destinations can inspire and entice potential travelers.

Consider the placement and context of images within your website design. Images should be strategically positioned to support and complement your content. Use them to break up text, highlight key points, or create visual interest. For example, you can use images as background elements or hero banners to make a strong visual statement. The right images have the power to leave a lasting impression on your visitors and make your website truly visually appealing.

Create a Balanced Layout

Creating a balanced layout is crucial in web design as it contributes to the overall visual appeal and user experience of a website. When elements are evenly distributed and placed thoughtfully, they create a sense of visual equilibrium and harmony.

To achieve a balanced layout, consider the placement and arrangement of text, images, and other design elements on the page. Distribute them strategically, ensuring that no single element overpowers or dominates the others. This can be achieved through techniques such as symmetry, asymmetry, or a grid-based layout.

Symmetrical balance involves arranging elements in a mirrored or evenly distributed manner, creating a formal and harmonious feel. It is often used in more traditional and conservative designs. Asymmetrical balance, on the other hand, involves arranging elements in an intentionally unbalanced but visually pleasing way. This approach adds a sense of dynamism and can be used to create more modern and creative designs.

With careful consideration of the placement, size, and visual weight of each element, you can create a balanced layout that guides the user’s eye, communicates hierarchy, and enhances the overall visual appeal. A well-balanced layout not only creates a visually pleasing design but also improves readability and usability, making it easier for visitors to navigate and engage with your website’s content.

Apply Visual Hierarchy

Visual hierarchy is a fundamental principle in web design that helps guide users’ attention and prioritize information effectively. By strategically applying various design elements such as size, color, contrast, and placement, you can establish a clear visual hierarchy on your website.

One of the key aspects of visual hierarchy is utilizing size appropriately. Larger elements tend to attract more attention, so use larger fonts for headings or important sections to make them stand out. Similarly, consider increasing the size of buttons or interactive elements to encourage user engagement. With contrasting sizes, you create a distinction between different elements and help users understand their relative importance.

Color is another powerful tool in establishing visual hierarchy. Use color strategically to draw attention to key elements. Vibrant or contrasting colors can make important elements stand out, while more muted or harmonious colors can be used for less prominent elements. Additionally, consider using color to create consistency and coherence with your brand identity.

Honorable Mentions

Designing a visually appealing website is essential for capturing the attention of users and creating a memorable browsing experience.

While we’ve covered some of the key aspects of visual design, there are some honorable mentions worth talking about. Visual multimedia elements, such as videos, animations, and interactive components, can enhance engagement and add an interactive dimension to your design. However, it’s important to use them judiciously and ensure they contribute to the overall user experience.

Additionally, responsive design deserves a special mention. Ensuring your website is responsive and adapts seamlessly to different screen sizes and devices is crucial in today’s mobile-first era. Responsive design guarantees that your website looks visually appealing and functions optimally across a range of devices, providing a consistent experience for users.

Remember, creating a visually appealing website goes beyond aesthetics—it also contributes to user satisfaction, brand perception, and ultimately, the success of your online presence. Take some time to think about how you can implement these tips into your design workflow. Standing on the shoulders of design giants, you can create a website that not only looks visually stunning but also delivers an exceptional user experience.

Rules and Guidelines of Web Design

In photography, there are rules or guidelines such as the rule of thirds, to assist in composing an image. But what rules are there in web design? There are actually several laws and principles that are commonly used in website design to create aesthetically pleasing and effective websites. Here are some of the most important rules-of-thumb in web design.

The Rule of Thirds

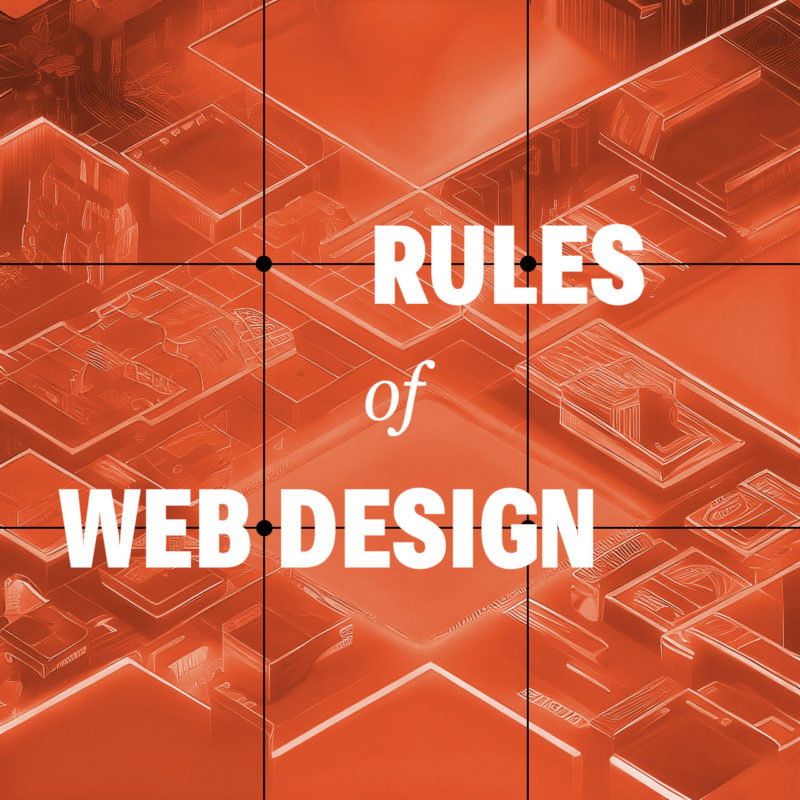
Believe it or not, the rule of thirds can even apply to web design as well, or any artform where you are composing a frame. The rule of thirds is a compositional guideline that divides an image into nine equal parts by two equally spaced horizontal lines and two equally spaced vertical lines. The important compositional elements of a design should be placed at the intersections of these lines, or along the lines themselves. The idea is that this creates a more balanced and visually appealing composition.

The rule of thirds can be used in web design to improve the aesthetics of your layouts. By placing important elements at the intersections of the rule of thirds grid, you can create a more dynamic and interesting composition.

For example, you could place your logo at the intersection of the top horizontal line and the left vertical line, and your call to action button at the intersection of the bottom horizontal line and the right vertical line. You could also use the rule of thirds to place your navigation bar, header, footer, and other important elements on your website.

Of course, the rule of thirds is just a guideline. You don’t have to follow it slavishly. But if you find that your designs are feeling a bit static or boring, try using the rule of thirds to see if it helps to create a more visually interesting and engaging design.

Use White Space

White space, also known as negative space, refers to the blank areas around and between design elements on a web page. It can be just as important as the content itself, as it can help to create a clean, organized, and visually pleasing design.

One of the benefits of white space is that it can make important content stand out. By leaving some areas of a page empty, the eye is naturally drawn to the content that is present. This can be particularly useful when trying to emphasize a call-to-action or other important information.

Another benefit of white space is that it can improve readability. By spacing out paragraphs, headers, and other text elements, it becomes easier for the reader to distinguish between them and to follow the flow of the content. This can be particularly important on mobile devices where screen space is limited.

When using white space, it’s important to strike a balance between too much and too little. Too much white space can make a page look sparse and unfinished, while too little can make a page look cluttered and overwhelming. It’s important to consider the purpose of the page, the content that will be included, and the overall design aesthetic when deciding how much white space to incorporate.

Be Consistent

Consistency is essential in web design, as it provides the necessary structure and organization to help users navigate through a website with ease. Consistency in design means that similar elements on different pages have the same look and feel, including typography, color, layout, and navigation. This not only makes the website more visually appealing, but it also helps users quickly recognize and understand how to interact with different components on the site.

When designing a website, consistency should be applied not only to the visual design but also to the user experience. This means that the website should be consistent in terms of functionality, such as the placement of navigation menus and buttons, the use of icons and symbols, and the overall flow of the website. Consistency in user experience ensures that users know what to expect from the website and how to navigate it, which leads to a better overall UX.

Another benefit of consistency in web design is that it can help establish a brand identity. A consistent visual style can help users identify and connect with a brand, making it easier for the brand to build brand recognition and loyalty.

Consider Contrast

Contrast is a crucial element of web design that can help to create visual interest and guide users’ attention to the most important content on a page, as well as improve it’s accessibility. Contrast can be achieved through the use of different colors, typography, shapes, and sizes.

One way to use contrast effectively in web design is to create a visual hierarchy. This involves using contrasting elements to differentiate between different levels of information on a page. For example, the use of bold, large typography for headlines can create contrast and draw the user’s attention to important information.

Another way to use contrast is to create a sense of depth and dimensionality in a design. By using contrasting colors and shades, web designers can create the illusion of layers and depth, which can make a design more visually engaging and memorable.

When using contrast in web design, it’s important to be mindful of accessibility. For example, using colors with insufficient contrast can make it difficult for users with visual impairments to read content. Designers should always ensure that their designs meet accessibility guidelines and are accessible to all users.

Limit the Number of Fonts

Using too many different fonts in web design can be a common mistake that can make a website look cluttered and unprofessional. It’s important to remember that typography is an art form and should be treated as such. When using multiple fonts, they should be carefully selected and paired in a way that is visually appealing and harmonious.

One approach to using multiple fonts in web design is to limit the number of fonts used to two or three, with each font serving a distinct purpose. For example, a website might use one font for headlines and another for body text. When selecting fonts, it’s also important to consider their style and how they complement each other. Fonts that are too similar can create confusion and make it difficult for users to distinguish between different sections of a website.

In addition to limiting the number of fonts used, it’s also important to consider font size, spacing, and hierarchy. Proper use of font size and spacing can help guide the user’s eye and make it easier to scan and read content. Hierarchy, or the order of importance of text on a page, can also be communicated through the use of font weight and style.

Using multiple fonts in web design can add visual interest and depth, but it’s important to do so in a thoughtful and intentional way. By limiting the number of fonts used and considering their style, size, spacing, and hierarchy, designers can create a cohesive and professional look for their website.

Don’t Let These Rules Cripple Your Creativity

These principles and rules help web designers create websites that are visually appealing, functional, and user-friendly. But these rules are just guidelines, and there are times when it’s okay to break them. For example, if you have a strong focal point, sometimes you may want to place it in the center of the frame. There is no one right way to build a website. Experiment with different layouts to see what works best for you and your brand. Ultimately, the best way to compose your design is to use your intuition.

User Experience: Tips and Best Practices for UX Design

User experience (UX) design is the process of enhancing user satisfaction with a product by improving the ease of use, efficiency of navigation, and pleasure provided in the user’s interaction with it. It is a critical component of web design, as it can make the difference between a website that is easy to use and navigate, and one that is frustrating and confusing. Good UX design ensures that visitors to a website can find the information they are looking for quickly and easily, and that they have a positive experience while using the site.

There are many different UX design principles, but here are just a few tips and best practices for improving the user experience on your website.

Simplicity

  • Less is More: The user interface should be easy to understand and use, without clutter and overwhelming visuals that don’t add value. Visitors should be able to quickly find what they are looking for and complete their tasks without having to think too much.
  • Clear Navigation: The navigation menu should be easy to locate and use. Make sure the menu items are clear, concise, and organized in a logical order.
  • Clarity of Purpose: The website should have a clear purpose and be easy to understand. Visitors should be able to quickly determine what the website is about and what they can do on it.
  • Clear and Concise Language: Avoid using jargon or technical terms that your users may not understand. Keep your sentences short and to the point.

Functionality

  • Mobile Optimization: With the increasing use of mobile devices, it’s crucial to design websites that are mobile-friendly. The website should be responsive, meaning it should adjust to different screen sizes.
  • Readability: The website should have a legible font and font size, with appropriate spacing and contrast between the text and background. It’s best to avoid using too many fonts and font sizes on the website.
  • Minimize Load Time: The website should load quickly, as users tend to lose interest if a website takes too long to load. Optimize images and videos and use efficient code to minimize load time.
  • Accessibility: Make sure the website is accessible to everyone, including those with disabilities. Use alt tags for images, and provide captions for videos.
  • Feedback: Provide visual feedback to users after they take any action on the website, such as filling out a form or clicking a button. This feedback assures the user that their action was successful.

Aesthetics

  • Attractive Design: The website should be visually appealing. The design should be consistent with the brand identity of the company or organization, and it should be easy on the eyes.
  • Use white space effectively: White space is important for creating a sense of balance and order on your website.
  • Consistent Design: A uniform design language throughout the website is essential to ensure that users can quickly understand the purpose of each page. Use consistent typography, colors, and spacing to maintain a cohesive design.
  • High-quality Media: Images and videos can help to break up text and make your website more visually appealing. They can also help to tell a story or illustrate a point.

A/B testing is a great way to improve UX design. By testing different variations of a website, web designers can see what works best for users and make improvements accordingly. For example, a web designer could test different headline styles, call to action buttons, or landing page layouts to see which one results in the most conversions.

These tips and best practices can help create a better user experience on your website. A good UX design is essential to ensure that users enjoy their experience on your website, and keep coming back for more.

Choosing Your Type: Fonts and the Art of Typography

Typography is the art and technique of arranging type to make written language visually appealing and easy to read. It involves selecting the right typeface, font size, and other typographic elements to create a desired effect.

Fonts are the core of typography. They can be used to create a variety of effects, from setting the tone or mood of a piece of text to making it more visually appealing. There are many different types of fonts available, each with its own unique characteristics. But with so many different fonts to choose from, it can be tough to know where to start.

Types of Fonts

There are many different types of fonts, but they can generally be divided into a few categories:

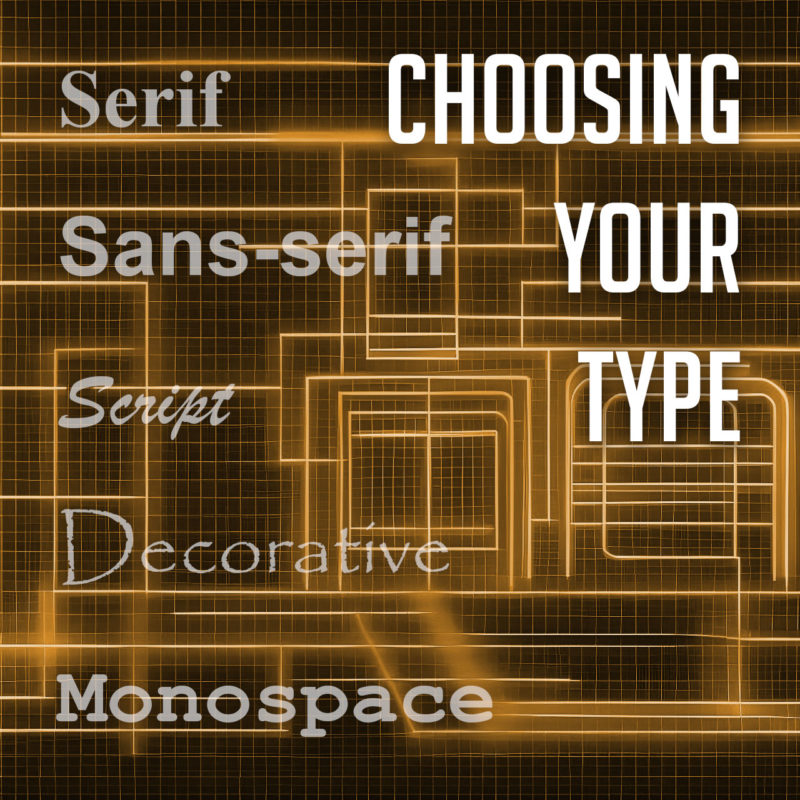
  • Serif fonts have small projections or flourishes called serifs at the ends of the main strokes of the letters, which can help guide the reader’s eye along the text. Serifs are thought to help with legibility by providing visual cues that help the eye track from one letter to the next. Serif fonts are often used in print publications like newspapers and books, and are often considered to be more traditional and formal than sans-serif fonts. Some popular serif fonts include Times New Roman, Georgia, and Trajan.
  • Sans serif fonts do not have serifs. They are often considered to be more modern and clean-looking than serif fonts. Sans-serif fonts are often used in digital media, such as websites and mobile apps, as they are easier to read on screens. Popular sans serif fonts include Arial, Helvetica, and Tahoma.
  • Script fonts are designed to look like handwriting or calligraphy. They often have a flowing, elegant appearance, and can be used to create a more personal or informal tone. Script fonts are often used for invitations, greeting cards, or other creative projects. Some common script fonts include Brush Script, Lobster, and Zapfino.
  • Display fonts, or decorative fonts, are more stylized to be eye-catching and attention-grabbing. They can be used for headlines, logos, or other special purposes, as they can add personality and visual interest to a design. The sky’s the limit for display fonts, but some of the most popular decorative fonts include Impact, Papyrus, and Curlz.
  • Monospace fonts have a fixed width for each character, and are typically characterized by their blocky appearance. This makes them useful for programming and coding, or other applications where precise alignment is necessary. They often have a simple, utilitarian design, which makes them well-suited for technical applications. Some popular monospace fonts include Courier, Consolas, and Source Code Pro.

Choosing the Right Font

11 out of 10 designers agree: Comic Sans is not your type

The best way to choose the right font for your project is to consider the overall look and feel you’re trying to achieve, and take into account the context and purpose of the text. If you’re designing a formal document, you might want to use a serif font. If you’re designing a modern website or marketing materials, you might want to use a sans serif font. And if you’re designing a logo or other special piece of artwork, you might want to use a script or decorative font. Different fonts can convey different emotions or tones, and choosing the right font can help enhance the message you’re trying to communicate.

It’s also important to consider the readability of your font. Some fonts are easier to read than others, especially at small sizes. If you’re using a font for body copy, it’s important to choose one that is easy to read on screen or in print.

Using Fonts Effectively

If the Pebbles font is too thin, try making it a little boulder

Once you’ve chosen the right font, it’s important to use it effectively. Here are a few tips:

  • Use only a few different fonts in a single project. Too many fonts can be overwhelming and distracting.
  • Use different fonts for different purposes. For example, you might use a serif font for body copy and a sans serif font for headlines.
  • Consider the size and weight of the font when choosing it. A large, bold font will be more eye-catching than a small, light font.
  • Use leading (the space between lines of text) and kerning (the space between individual letters) to improve the readability of your text.
  • Use a consistent font family throughout a piece of text. This will help to create a cohesive and professional look.
  • Use fonts to create visual interest. For example, you could use a decorative font for a call to action or a unique font for a logo.
  • Proofread your text carefully before using it in your designs.
  • Experiment with different fonts and layouts to find what works best for your project. There are no hard and fast rules in typography, so don’t be afraid to try new things.

When used effectively, fonts can be a powerful tool for creating visually appealing and effective typography. By choosing the right fonts and using them effectively, you can create beautiful and effective designs.