Lazy Loading: Optimizing Website Speed and User Experience

In today’s fast-paced world, where instant gratification is the norm, the need for blazing-fast websites has never been greater. Picture visiting a website, eagerly awaiting its content, only to be greeted by a loading spinner that seems to take ages. Frustrating, right? Well, say goodbye to those days of waiting, because lazy loading is here to save the day!

Lazy loading is like having a personal assistant who knows exactly what you need and delivers it right when you need it. It’s a clever technique that ensures your website loads lightning-fast by loading only the essential content first and deferring the rest until later. With lazy loading, images, videos, and other resource-heavy elements are loaded on-the-fly as users scroll down the page or interact with specific sections. This means your visitors get to experience your website’s magic instantly, without any annoying delays.

But lazy loading isn’t just about speed. It’s a game-changer for user experience. Imagine a seamless browsing experience where your website adapts to the user’s behavior, revealing content precisely when they want it. It’s like unveiling a treasure trove of information as users explore your site, keeping them engaged and hungry. Get ready to transform your website into a nimble and captivating experience that will leave your users craving for more.

What is Lazy Loading?

Lazy loading is a technique in web development that delays the loading of certain website elements, such as images, videos, and scripts, until they are needed. Unlike traditional loading methods where all content is loaded upfront, lazy loading focuses on loading content progressively as users interact with the page. This is achieved by dynamically loading content only when or just before it becomes visible within the user’s viewport.

The primary advantage of lazy loading is its ability to significantly reduce initial page load time. By deferring the loading of non-essential content, lazy loading allows the critical elements of a page to load quickly, providing users with a faster and more responsive browsing experience. This improved performance is particularly noticeable on bandwidth-limited connections or when accessing websites on mobile devices.

Lazy loading also has positive implications for SEO and user engagement. Search engines consider page load time as a ranking factor, and by implementing lazy loading, you can enhance your website’s performance, leading to improved search engine visibility. Additionally, lazy loading can enhance user engagement by allowing users to consume content immediately, without waiting for all elements to load. This can lead to increased page views, longer visit durations, and lower bounce rates, ultimately improving the overall user experience.

Types of Content Suitable for Lazy Loading

When it comes to lazy loading, the possibilities are endless. You can apply this technique to various types of content that tend to slow down page loading times. Let’s explore some of the content types that can benefit from the magic of lazy loading:

  1. Images: Images are often the largest and most resource-intensive elements on a webpage. Lazy loading images ensures that only the images within the viewport or those about to come into view are loaded, while the rest patiently await their turn. This significantly reduces initial page load times and helps conserve precious bandwidth.
  2. Videos: With the popularity of videos skyrocketing, lazy loading them has become essential. Instead of loading all the videos on a page at once, you can lazily load them as users scroll, saving bandwidth and reducing the initial load time. Users can enjoy a seamless video-watching experience without any buffering interruptions.
  3. Iframes: Iframes are commonly used to embed external content like maps, social media feeds, or advertisements. Lazy-loading iframes can prevent them from slowing down the initial page load. Users will only experience the loading delay when they interact with the specific iframe, ensuring a smoother overall browsing experience.

Best Practices for Lazy Loading Different Content Types

The Website Weight Loss Guide

While lazy loading offers tremendous benefits, it’s important to implement it correctly for each content type. Here are some best practices to consider:

  • Images: Optimize your images for the web by compressing them without compromising quality. Use the appropriate image format (e.g., JPEG, PNG, or SVG) based on the content. Consider using placeholder images to maintain the layout before lazy loading the actual images.
  • Videos: Choose a reliable video hosting platform that supports lazy loading. Use the appropriate video format and ensure the videos are optimized for web playback. Consider adding thumbnail images or placeholders to provide visual cues and improve the overall user experience.
  • Iframes: Evaluate the necessity of each iframe and consider lazy loading them only when they come into view or when users interact with relevant triggers. Ensure that the iframes are responsive and adjust well to different screen sizes.

Real-World Examples and Use Cases

Let’s explore some real-world examples to showcase the power of lazy loading:

  • Image Galleries: In a photography portfolio website, lazy loading can be applied to image galleries. As users scroll through the gallery, the images load dynamically, creating a smooth and immersive browsing experience.
  • News Websites: On news websites, lazy loading can be implemented for articles’ featured images. Only the images in the viewport or those near it are loaded, allowing for faster load times and a seamless reading experience.
  • Social Media Feeds: Social media platforms often use lazy loading to optimize the loading of images, videos, and iframes within users’ feeds. This ensures that the content loads progressively, providing a seamless scrolling experience.

Implementing Lazy Loading

Implementing lazy loading can be achieved through various methods, including utilizing JavaScript libraries and frameworks specifically designed for this purpose. Additionally, modern browsers provide a native lazy loading attribute, loading="lazy", which offers a simple and efficient way to implement lazy loading without external dependencies.

  1. Intersection Observer API: The Intersection Observer API is a built-in JavaScript API that allows you to efficiently track when an element enters or exits the viewport. It provides a native way to implement lazy loading, making it lightweight and performant.
  2. LazyLoad: LazyLoad is a lightweight JavaScript library that simplifies the process of lazy loading images, videos, and iframes. It offers an easy-to-use implementation, enabling you to add lazy loading functionality to your website with minimal code changes.
  3. lozad.js: lozad.js is another lightweight and dependency-free library specifically designed for lazy loading images. With its simple syntax, you can easily apply lazy loading by adding a specific class to the elements you want to lazily load.
  4. Native lazy loading attribute: Modern browsers support the loading="lazy" attribute, which can be added to image and iframe elements. Adding this attribute tells the browser to automatically lazy load the specified content as it comes into view, without the need for any additional JavaScript or libraries.

Optimizing Lazy Loading Configurations

While implementing lazy loading, it’s essential to optimize the configurations for improved performance and user experience:

  1. Prioritize critical content: Ensure that the essential content is loaded immediately, even before users start scrolling. This guarantees that vital information is promptly displayed to your users.
  2. Fine-tune thresholds: Experiment with the intersection thresholds to determine the ideal point at which lazy loading should initiate. Adjust these thresholds to strike a balance between loading elements in advance and conserving resources.
  3. Consider preloading: Combine lazy loading with preloading techniques, such as using the “preload” attribute, to further optimize the loading process. Preloading hints the browser to fetch the lazy-loaded resources in advance, reducing any potential delay.

Lazy Loading Best Practices

Enhancing Lazy Loading with Placeholders and Loading Animations

To enhance the visual experience during lazy loading, consider the following techniques:

  1. Placeholder images: Use lightweight placeholder images as temporary placeholders while lazy-loaded images are loading. These placeholders provide a visual cue to users and help maintain the overall layout and design of the webpage.
  2. Loading animations: Implement loading animations to provide feedback to users during the lazy loading process. These animations can be simple spinners or progress bars that indicate the loading progress, keeping users engaged and informed.

Testing and Monitoring Lazy Loading Implementations

To ensure optimal performance and identify any potential issues with lazy loading, follow these practices:

  1. Performance testing: Regularly conduct performance tests to measure the impact of lazy loading on page load times. Use tools like Lighthouse, WebPageTest, or Chrome DevTools to assess the performance improvements and identify areas for optimization.
  2. Cross-browser and device testing: Test your lazy loading implementation across various browsers and devices to ensure compatibility and consistent behavior. Pay particular attention to older browsers and devices with limited resources to ensure a seamless experience for all users.
  3. Monitor user feedback and behavior: Analyze user feedback and behavior using tools like Google Analytics to identify any issues or areas for improvement. Monitor metrics such as bounce rate, session duration, and conversion rates to gauge the impact of lazy loading on user engagement.

Implementing lazy loading on your website offers numerous benefits, including improved page load times, enhanced user experience, and reduced bandwidth usage. Selectively loading content as users interact with the page ensures a faster initial load and allows for a smoother browsing experience.

Not only does lazy loading positively impact performance and user engagement, but it also has implications for SEO. By reducing page load times and improving user experience metrics, such as bounce rate and time on page, lazy loading can indirectly contribute to better search engine rankings.

Accessibility is another important consideration when implementing lazy loading. It is crucial to ensure that all users, including those with disabilities, can access and interact with the lazy-loaded content. Implementing appropriate fallback mechanisms and providing alternative access options is essential for inclusive web design.

Looking ahead, the future of lazy loading holds promising advancements. As technologies continue to evolve, we can expect further improvements in lazy loading techniques, including more efficient algorithms and native browser support. Additionally, innovations such as predictive lazy loading, where content is loaded in anticipation of user actions, may further enhance the user experience.

To stay at the forefront of lazy loading trends and advancements, it is essential to keep up with industry developments and explore new tools and techniques. Regularly evaluate your lazy loading implementation, considering performance, SEO, and accessibility factors, and make adjustments as necessary to ensure optimal results.

Wield the power of lazy loading to create websites that not only deliver exceptional performance and engage users effectively but also remain adaptable to the ever-evolving web landscape. Embrace lazy loading as a valuable tool in your web design toolkit, and unlock the potential to create stunning, high-performing websites that leave a lasting impact.


6 Tips for Visually Appealing Web Design

Picture a website that instantly grabs your attention with its stunning visuals, seamlessly blending colors, typography, and imagery to create an immersive experience. In web design, aesthetics hold immense power. They can captivate users, communicate brand identity, and leave a lasting impression. It’s no wonder that designing a visually appealing website is a top priority for every web designer.

Here we will explore some of the top tips and best practices that will empower you to craft designs that not only look stunning but also enhance user engagement and create a memorable digital presence. With the perfect blend of aesthetics, functionality, and user experience, your website can leave visitors awestruck and craving for more.

Use a Consistent and Cohesive Color Scheme

When it comes to creating a visually appealing website, color is a powerful tool that can evoke emotions, convey meaning, and establish a strong brand identity. Choosing a consistent and cohesive color scheme is essential for creating a harmonious visual experience.

Start by understanding your brand’s personality and the emotions you want to evoke in your audience. Are you aiming for a bold and energetic vibe, or perhaps a calm and serene atmosphere? Once you have clarity on your brand’s essence, carefully select a color palette that reflects these qualities.

Consider using colors that complement each other and create a sense of visual harmony. A good rule of thumb is to choose a primary color as the foundation and then select a few complementary or analogous colors to accompany it. Remember to strike a balance between using bold, attention-grabbing colors and more subtle shades that provide balance and contrast.

Use colors strategically to guide users’ attention and create visual hierarchy. For instance, make important elements, such as call-to-action buttons or key headings, stand out by using a contrasting color that draws the eye. Use more subdued colors for secondary elements to ensure they don’t compete for attention.

With a consistent and cohesive color scheme, you not only create an aesthetically pleasing website but also establish a strong brand presence that resonates with your audience. Let your colors speak for your brand and create an immersive visual experience that leaves a lasting impression.

Choose Complementary Fonts

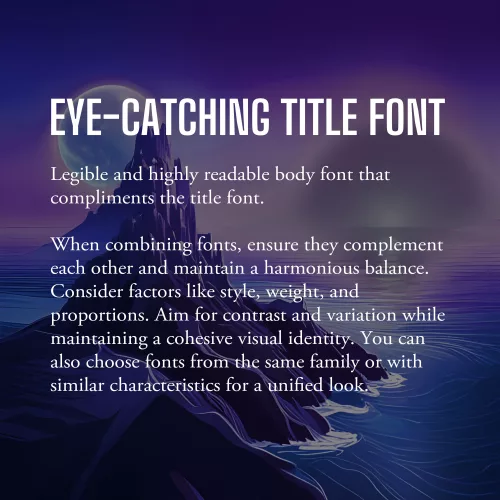
Example font pairing

Fonts play a significant role in web design, as they contribute to the overall look and feel of your website. When selecting fonts, it’s essential to choose ones that are not only legible but also visually appealing and complementary to your design aesthetic.

The first consideration when choosing fonts is legibility. Ensure that the fonts you select are easy to read, even at smaller sizes or on different devices. Legible fonts have clear and distinct letterforms, appropriate spacing between characters, and consistent stroke widths. Test the fonts across various screen sizes and devices to ensure they maintain their readability.

Once you have identified legible fonts, it’s time to think about the visual appeal and creating a harmonious typography scheme. Consider using a combination of fonts to add visual interest and establish a clear hierarchy within your design. One popular approach is to pair a sans-serif font with a serif font.

Sans-serif fonts, with their clean and modern appearance, are often used for headings and titles. They provide a contemporary and straightforward look that grabs attention and makes a bold statement. Serif fonts, on the other hand, have decorative strokes at the ends of characters, giving them a more traditional and elegant feel. They are commonly used for body text as they enhance readability and create a sense of familiarity.

When combining fonts, ensure that they complement each other and create a harmonious balance. Consider their overall style, weight, and proportions. Aim for contrast and variation between the fonts while maintaining a cohesive visual identity. Pairing fonts from the same font family or fonts that share similar characteristics can also create a cohesive and unified look.

Additionally, be mindful of the number of fonts you use on your website. Using too many fonts can lead to visual clutter and confusion. Stick to a limited number of fonts (typically two or three) to maintain consistency and a polished appearance throughout your website.

As with all design choices, it’s crucial to consider your target audience and the message you want to convey. Fonts can evoke different emotions and associations, so choose fonts that align with your brand personality and the overall tone of your website.

Incorporate Whitespace

Whitespace, or negative space, is a powerful yet often underutilized element. It refers to the empty space between elements on a webpage, and it plays a crucial role in creating a visually appealing and user-friendly design.

Whitespace is not just empty space; it is a deliberate design choice that brings balance, clarity, and elegance to your website. Incorporate ample white space to give your content room to breathe, allowing it to stand out and capture the user’s attention. This clean and uncluttered layout creates a sense of organization and makes it easier for visitors to navigate and digest your content.

One of the key benefits of whitespace is enhanced readability. The absence of visual clutter allows users to focus on the important elements and absorb information more easily. Whitespace also helps guide the user’s eye and establish a clear visual hierarchy, making it easier to prioritize content and highlight key messages.

Aesthetically, whitespace creates a sense of elegance and sophistication in your design. It gives your website a modern and spacious feel, conveying a sense of professionalism and attention to detail. When used strategically, whitespace can evoke a sense of luxury, simplicity, and elegance that resonates with your audience.

When incorporating whitespace, consider the overall layout and spacing between elements. Give generous margins around text blocks, images, and buttons. Be mindful of the spacing between different sections and elements on the page. Experiment with different layouts and proportions to find the right balance that suits your content and design aesthetic.

Use High-quality and Relevant Images

Incorporating visually appealing images is a powerful way to enhance the overall aesthetic of your website and captivate your audience. Well-chosen and carefully curated images can communicate your brand message, evoke emotions, and provide valuable context to your content.

First and foremost, prioritize high-quality images. Blurry or pixelated images can significantly impact the visual appeal of your website and create an unprofessional impression. Invest in high-resolution images that are crisp, clear, and vibrant. If you’re using photographs, ensure they are well-lit and properly composed.

Relevance is another crucial aspect to consider when choosing images. Select visuals that are closely aligned with your brand identity, content, and target audience. The images you choose should enhance the message you’re trying to convey and resonate with your visitors. For example, if you’re designing a website for a travel agency, incorporating captivating images of beautiful destinations can inspire and entice potential travelers.

Consider the placement and context of images within your website design. Images should be strategically positioned to support and complement your content. Use them to break up text, highlight key points, or create visual interest. For example, you can use images as background elements or hero banners to make a strong visual statement. The right images have the power to leave a lasting impression on your visitors and make your website truly visually appealing.

Create a Balanced Layout

Creating a balanced layout is crucial in web design as it contributes to the overall visual appeal and user experience of a website. When elements are evenly distributed and placed thoughtfully, they create a sense of visual equilibrium and harmony.

To achieve a balanced layout, consider the placement and arrangement of text, images, and other design elements on the page. Distribute them strategically, ensuring that no single element overpowers or dominates the others. This can be achieved through techniques such as symmetry, asymmetry, or a grid-based layout.

Symmetrical balance involves arranging elements in a mirrored or evenly distributed manner, creating a formal and harmonious feel. It is often used in more traditional and conservative designs. Asymmetrical balance, on the other hand, involves arranging elements in an intentionally unbalanced but visually pleasing way. This approach adds a sense of dynamism and can be used to create more modern and creative designs.

With careful consideration of the placement, size, and visual weight of each element, you can create a balanced layout that guides the user’s eye, communicates hierarchy, and enhances the overall visual appeal. A well-balanced layout not only creates a visually pleasing design but also improves readability and usability, making it easier for visitors to navigate and engage with your website’s content.

Apply Visual Hierarchy

Visual hierarchy is a fundamental principle in web design that helps guide users’ attention and prioritize information effectively. By strategically applying various design elements such as size, color, contrast, and placement, you can establish a clear visual hierarchy on your website.

One of the key aspects of visual hierarchy is utilizing size appropriately. Larger elements tend to attract more attention, so use larger fonts for headings or important sections to make them stand out. Similarly, consider increasing the size of buttons or interactive elements to encourage user engagement. With contrasting sizes, you create a distinction between different elements and help users understand their relative importance.

Color is another powerful tool in establishing visual hierarchy. Use color strategically to draw attention to key elements. Vibrant or contrasting colors can make important elements stand out, while more muted or harmonious colors can be used for less prominent elements. Additionally, consider using color to create consistency and coherence with your brand identity.

Honorable Mentions

Designing a visually appealing website is essential for capturing the attention of users and creating a memorable browsing experience.

While we’ve covered some of the key aspects of visual design, there are some honorable mentions worth talking about. Visual multimedia elements, such as videos, animations, and interactive components, can enhance engagement and add an interactive dimension to your design. However, it’s important to use them judiciously and ensure they contribute to the overall user experience.

Additionally, responsive design deserves a special mention. Ensuring your website is responsive and adapts seamlessly to different screen sizes and devices is crucial in today’s mobile-first era. Responsive design guarantees that your website looks visually appealing and functions optimally across a range of devices, providing a consistent experience for users.

Remember, creating a visually appealing website goes beyond aesthetics—it also contributes to user satisfaction, brand perception, and ultimately, the success of your online presence. Take some time to think about how you can implement these tips into your design workflow. Standing on the shoulders of design giants, you can create a website that not only looks visually stunning but also delivers an exceptional user experience.

Using Images and Video to Enhance Your Website

On the fast-paced web, the importance of captivating visuals in website design cannot be overstated. Images and videos have the power to engage users, convey your brand’s narrative, and leave a lasting impact.

Visuals are the lifeblood of website design, acting as a magnetic force that draws visitors in and compels them to explore further. They possess a unique ability to communicate complex ideas, evoke emotions, and weave stories that resonate with your audience. A skillful web designer will harness the potential of images and videos to create an immersive user experience, boost engagement, and ultimately drive conversions.

Choosing the Right Images

Before diving into the captivating world of visuals, it’s imperative to understand your target audience. Take a moment to envision the individuals who will visit your website. What are their demographics, interests, and preferences? By developing a deep understanding of your audience, you can curate a visual experience that resonates with their desires and aspirations.

Every image on your website should have a purpose—a reason for being. Whether it’s to showcase your products, highlight your brand’s personality, or evoke specific emotions, clarity on the purpose of each image is paramount. Each visual should contribute to the larger narrative of your website, seamlessly weaving together a cohesive story that captivates your visitors.

When it comes to visuals, quality reigns supreme. Seek out high-resolution images that are sharp, vibrant, and visually appealing. Pixelated or blurry visuals can instantly undermine your credibility and diminish the user experience. Additionally, relevance is key. Choose images that align with your brand identity, resonate with your audience’s interests, and enhance the overall aesthetic of your website.

Incorporating Images Effectively

Images possess the transformative ability to elevate your website’s visual appeal and establish a strong brand identity. Choose images that align with your brand personality, values, and desired tone. Whether it’s bold and adventurous or elegant and refined, let your visuals speak the language of your brand and create a seamless experience that resonates with your audience.

Visuals have the remarkable ability to communicate complex ideas, evoke emotions, and tell stories that linger in the hearts and minds of your visitors. Leverage this power by selecting images that align with your content and enhance your message. Whether it’s a powerful photograph, an expressive illustration, or a carefully crafted infographic, let your visuals captivate and engage your audience on a profound level.

Strategic placement of images is key to crafting an exceptional user experience. Consider the flow of your website and strategically position visuals to guide visitors through your content. Break up lengthy paragraphs with relevant images to provide visual relief and maintain engagement. Utilize images to highlight key points, draw attention to important elements, and create visual signposts that keep users on the right path. A well-placed image can be the difference between a mundane browsing experience and an unforgettable journey.

Background images and sliders have the potential to create an instant wow factor for your website. They set the stage and establish a captivating atmosphere. Opt for images that complement your content, enhance readability, and create a harmonious visual backdrop. Ensure that the text and other elements overlaying the images remain legible, striking the perfect balance between visual appeal and usability. Sliders, when used judiciously, can showcase multiple images that highlight different facets of your brand or key offerings, enticing visitors to explore further.

Optimizing Images for SEO

When it comes to optimizing images for search engine visibility, file names matter. Instead of settling for generic names like “IMG_1234.jpg,” seize the opportunity to provide descriptive and keyword-rich file names. Incorporate relevant keywords that align with your content, helping search engines understand the context and improve your chances of ranking higher in search results. Painting a clear picture with your file names increases the discoverability of your images and enhances your website’s overall SEO performance.

Alt text, or alternative text, is a vital component of image optimization. It serves a dual purpose: enhancing accessibility for visually impaired users and providing valuable information for search engines. Craft concise and descriptive alt text that accurately describes the image’s content and context. Incorporate relevant keywords naturally while ensuring the text remains meaningful and user-friendly.

On today’s web, responsive design is no longer optional—it’s essential. With an increasing number of users accessing websites on mobile devices, ensuring a seamless and visually appealing experience across different screen sizes is paramount. When incorporating images, consider their responsiveness. Optimize images for mobile devices by using CSS techniques or responsive image solutions that dynamically adapt to different screen sizes. This not only enhances user experience but also aligns with search engine preferences for mobile-friendly websites, potentially improving your visibility in mobile search results.

Utilizing Videos for Engaging Content

Videos possess an unmatched power to captivate, educate, and entertain. They create an immersive experience, allowing you to convey complex ideas and emotions in a concise and visually compelling format. With attention spans dwindling, harnessing the power of videos is paramount to keeping your audience engaged, increasing dwell time, and ultimately driving conversions.

Just as every website has its unique story, each video should have a purpose that aligns with your website’s goals and resonates with your audience. Identify suitable video content that complements your brand, captures your audience’s attention, and serves their needs. Whether it’s product demonstrations, tutorials, testimonials, or engaging storytelling, let your videos be the perfect supporting actors in your website’s visual narrative.

To seamlessly incorporate videos into your website, leverage popular video platforms like YouTube or Vimeo. These platforms offer reliable hosting, robust video management features, and wide compatibility across devices. Upload your videos to these platforms and embed them into your website’s pages, ensuring a smooth playback experience for your visitors. Embedding videos also allows you to tap into the vast user bases and social sharing capabilities of these platforms, expanding the reach and visibility of your content.

Enhancing Performance and Accessibility

While visual media can greatly enhance the user experience, it can also impact website loading times. To optimize website performance, implement strategies that ensure swift loading speed without compromising on the visual appeal. Compress and optimize images and videos and leverage caching techniques to deliver a seamless browsing experience. By prioritizing speed, you not only satisfy impatient visitors but also please search engines, which consider loading speed as a ranking factor.

Lazy loading is a technique that prioritizes efficiency by loading images and videos only when they come into view. Rather than loading all visuals at once, lazy loading conserves bandwidth and speeds up initial page load times. As visitors scroll down the page, images and videos are loaded dynamically, reducing the strain on resources and providing a smoother user experience.

In the grand symphony of website design, performance and accessibility harmonize to create a truly exceptional user experience. By optimizing website loading speed, implementing lazy loading, ensuring accessibility, and balancing visual appeal with performance, you orchestrate a seamless blend of efficiency and inclusivity.

Unleash the Power of Visual Media

From images that capture attention to videos that engage and mesmerize, incorporating visual elements effectively can transform your website into a captivating digital masterpiece. They enhance aesthetics, convey messages, and create immersive experiences that leave a lasting impression on your audience. By understanding your target audience, defining the purpose of your visuals, strategically placing them, and optimizing their loading speed and accessibility, you unlock the true power of visuals to captivate, engage, and convert.

As technology advances and design trends evolve, the world of web design will continue to be a canvas for innovation and creativity. Stay informed, and embrace the future of visual experiences. Let your creativity soar, your brand shine, and your audience be captivated.

Responsive Images: Optimizing Web Design With Adaptive Visuals

Have you ever visited a website on your smartphone and found that the images were either too small, too large, or cropped in a weird way? If so, you have encountered a website that does not use responsive images. Responsive images are images that adjust to different screen sizes, resolutions, positions, and other factors. They are essential for creating websites that work well on devices with widely differing screen sizes, resolutions, and other such features.

In this dynamic world where devices come in various sizes and resolutions, incorporating responsive images has become essential. Ensuring that images adapt seamlessly to different screens is not only crucial for a visually appealing website but also for optimal user experience. In this article, we will explore the concept of responsive images and delve into the techniques and best practices for effectively using them in web design. Whether you’re a seasoned developer or just starting with responsive web design, this guide will equip you with the knowledge to create visually stunning and high-performing websites.

Understanding Responsive Images

Responsive images refer to the practice of optimizing and delivering images that adapt fluidly to different viewport sizes, ensuring they look visually appealing and load efficiently across devices.

To comprehend the significance of responsive images, it’s essential to understand the challenges they address. When a non-responsive image is displayed on a smaller screen, it often appears oversized and can cause layout issues or disrupt the overall user experience. Additionally, non-optimized images can significantly impact page load speed, leading to frustrated users and potential loss of visitors.

The impact of images on page load speed cannot be underestimated. Large, unoptimized images can drastically slow down a website’s performance, leading to increased bounce rates and diminished user engagement. Therefore, optimizing images for responsive design involves not only selecting the appropriate format but also minimizing file sizes through compression techniques and employing responsive image solutions.

However, creating responsive images is not as simple as it sounds. There are several challenges that web designers and developers need to overcome, such as:

  • The art direction problem: This is the problem of displaying different cropped images for different layouts, depending on what part of the image is relevant for each device. For example, a header image that shows a group of people may need to be cropped differently for a mobile device than for a desktop device, so that the faces of the people are still visible.
  • The bandwidth problem: This is the problem of serving different image sizes for different devices, depending on their screen resolution and network speed. For example, a high-resolution image that looks sharp on a 2x display may be too large and slow to load on a 1x display or on a slow network.

Fortunately, there are some tools and techniques that can help us create responsive images using HTML and CSS. In this article, we will explore how to use features like srcset and the picture element to implement responsive image solutions on websites. We will also look at how to use vector graphics as an alternative to raster graphics for responsive images that can scale without losing quality.

Implementing Responsive Images in HTML and CSS

To bring responsive images to life in your web design, you’ll need to understand the HTML and CSS techniques that enable their seamless integration. By using the appropriate HTML markup and CSS rules, you can ensure that your images adapt flawlessly to various screen sizes and resolutions.

CSS media queries play a significant role in adjusting image size and resolution based on the viewport dimensions. By defining specific CSS rules within different media query breakpoints, images can be resized proportionally to fit the available space. For example, you can use the “max-width” property to set a maximum image width and ensure that it scales down proportionally as the viewport size decreases. By combining media queries with CSS properties like “max-width,” “width,” and “height,” web designers can create fluid and adaptive image layouts.

The “srcset” attribute is another valuable tool for delivering responsive images. It allows you to provide multiple image sources and resolutions, enabling the browser to select the most appropriate version based on the device’s capabilities. With the “srcset” attribute, you can include different image files with varying resolutions, sizes, and formats. The browser then selects the most suitable image to display, optimizing both the image quality and page load speed. This attribute is particularly beneficial for devices with high-resolution screens like Retina displays, where crisp and clear images are essential.

Additionally, the “sizes” attribute complements the “srcset” attribute by specifying image sizes based on viewport breakpoints. By using the “sizes” attribute, you can indicate the image’s display size relative to the viewport width. This information helps the browser determine the appropriate image source from the “srcset” based on the available space. The “sizes” attribute uses a syntax that includes media queries and descriptors, allowing you to define different image sizes for specific viewport ranges. This flexibility ensures that images adapt precisely to different screen sizes and resolutions.

To put this into practice, we can use the “srcset” attribute directly on the “img” element to provide multiple image sources with their respective resolutions. Additionally, you can use the “sizes” attribute to specify the image’s display size relative to the viewport width. This combination allows the browser to select the most appropriate image based on the available space.

Here’s an example of how the “img” element can be used with the “srcset” and “sizes” attributes:

<img src="image-default.jpg" srcset="image-small.jpg 480w, image-medium.jpg 768w, image-large.jpg 1200w" sizes="(max-width: 768px) 100vw, 1200px" alt="Image Illustration">

In the example above, we have defined different image sources and specified that the image should occupy 100% of the viewport width for screens up to 768 pixels wide and use a fixed width of 1200 pixels for larger screens.

A more modern option for implementing responsive images is the “picture” element. It provides a flexible and powerful way to define multiple sources for an image based on different conditions. Within the “picture” element, you can specify different “source” elements, each with its own “srcset” and “media” attributes. The “srcset” attribute lists the image sources with their respective resolutions and formats, while the “media” attribute defines the media query conditions for each source. This allows the browser to choose the most suitable image based on the viewport size and other specified criteria. To ensure compatibility with older browsers, it’s important to include a fallback “img” element within the “picture” element that specifies a default image source using the “src” attribute.

Here’s an example of how the “picture” element can be used to implement responsive images:

<picture>
    <source srcset="image-small.jpg" media="(max-width: 480px)">
    <source srcset="image-medium.jpg" media="(max-width: 768px)">
    <source srcset="image-large.jpg" media="(min-width: 769px)">
    <img src="image-default.jpg" alt="Image Illustration">
</picture>

In the example above, we define three different image sources with their respective “srcset” attributes and associated media queries. The browser will choose the appropriate image source based on the viewport width. If none of the media queries match, the “img” element’s source specified by the “src” attribute will be used as a fallback.

To complement the HTML markup, CSS plays a crucial role in setting up breakpoints and media queries for different screen sizes. By using CSS media queries, you can define specific styles for various viewport ranges, ensuring that your images adapt elegantly to each scenario. For example, you might adjust the image size, alignment, or visibility based on the viewport width.

@media (max-width: 480px) {
    /* CSS rules for small screens */
}

@media (max-width: 768px) {
    /* CSS rules for medium screens */
}

@media (min-width: 769px) {
    /* CSS rules for large screens */
}

Here we have defined CSS rules for different screen sizes using media queries. Within each media query block, you can apply specific styles to your images or other elements as needed. By combining HTML markup with the appropriate CSS rules, you can create responsive images that adapt beautifully to various devices and screen sizes.

Image Optimization for Responsiveness

Achieving optimal image performance is a critical aspect of creating responsive web designs. As images play a significant role in both visual appeal and page load speed, it’s essential to implement effective image optimization techniques. By reducing file sizes without compromising quality, web designers can ensure that responsive images load swiftly across devices while maintaining their visual integrity.

One of the primary techniques for optimizing image file sizes is compression. Image compression reduces the file size by eliminating unnecessary data while preserving the image’s visual quality. There are two types of compression: lossy and lossless. Lossy compression selectively discards data, resulting in a smaller file size but a slight reduction in image quality. Lossless compression, on the other hand, reduces the file size without sacrificing quality, making it ideal for images where visual fidelity is crucial.

To enhance image optimization further, leveraging modern image formats can significantly impact file sizes and performance. Formats like WebP and AVIF offer superior compression capabilities compared to traditional formats like JPEG and PNG. WebP, developed by Google, provides impressive compression ratios while maintaining high image quality. AVIF (AV1 Image File Format), based on the AV1 video codec, delivers even better compression efficiency. By adopting these modern formats, web designers can reduce file sizes significantly without sacrificing image clarity.

Fortunately, there are numerous tools and plugins available that streamline the image optimization process. These tools automate compression and conversion tasks, making it easier to optimize images for responsiveness. Popular tools like ImageOptim, Kraken.io, and TinyPNG offer user-friendly interfaces and batch processing capabilities, allowing you to optimize multiple images simultaneously. Content delivery networks (CDNs) and caching plugins also play a vital role in optimizing image delivery, ensuring that responsive images are served efficiently to users.

Best Practices for Responsive Images

To ensure an optimal user experience and efficient performance, it’s important to follow best practices when designing responsive images. By considering image resolutions, loading optimizations, and the specific needs of different devices, you can create responsive designs that deliver fast-loading, visually appealing content across various screen sizes.

  • Selecting Appropriate Image Resolutions and Sizes
    When choosing images for your responsive design, consider the resolution and pixel density needed for each device. Provide different image versions for different breakpoints to ensure sharp and clear visuals on all devices. Use high-resolution images for high-density displays and optimize file sizes to balance quality and performance.
  • Optimizing Image Loading
    Load times play a crucial role in user experience, particularly on mobile devices with limited bandwidth. Implement techniques such as lazy loading, which delays the loading of off-screen images until they are about to be viewed. This approach reduces initial page load times and improves performance. Additionally, leverage modern image formats like WebP or AVIF, which provide better compression and smaller file sizes compared to traditional formats like JPEG or PNG. Use responsive image optimization tools or plugins to automatically generate and serve appropriate image formats based on the user’s device capabilities.
  • Considering Needs of Different Devices
    Each device has unique characteristics and display capabilities that should be considered when designing responsive images. For mobile devices, focus on optimizing image sizes to ensure fast loading and minimize data consumption. Consider the impact of network conditions and prioritize essential visual content for smaller screens. For desktop and larger screens, provide higher-resolution images to take advantage of the available screen real estate. Use CSS media queries to define breakpoints and adjust image sizes and resolutions accordingly. Tailor the visual experience to each device category while maintaining consistency in branding and design.

These best practices can help you create responsive image designs that enhance user experience, improve performance, and adapt seamlessly to different devices. Remember to test your designs across various devices and network conditions to ensure optimal results.

Give It A Try

Responsive images are a crucial component of modern web design, allowing websites to adapt seamlessly to different devices and screen sizes. By implementing responsive image techniques, you can deliver an enhanced user experience, improve page load times, and optimize your website for search engine visibility.

By incorporating these techniques and adhering to best practices, you can ensure a visually appealing and seamless browsing experience for your users across a variety of devices. Responsive images not only enhance user satisfaction but also contribute to improved search engine rankings, as search engines prioritize websites that provide a responsive and mobile-friendly experience.

Embracing responsive image design is essential for staying ahead in the ever-evolving digital landscape. By optimizing image display, loading times, and accessibility, you can create engaging websites that captivate users and drive meaningful interactions. Start implementing responsive image techniques today to unlock the full potential of your web design and provide a superior user experience.